Tuesday, 28 May 2013

Best Dad in the World Card & Papers

This week, the docrafts Creativity Club have part 2 of my ‘All Tooled Up Father’s Day' printables collection available to members to download. My Dad is due to go in for a back operation today, so I used a selection of them to create this card to wish him luck…


I used a Papermania recycled A6 Kraft card blank as a base them added a series of layered die-cut shapes (mounted onto card for strength). The top rectangle was created by running the distressed cream paper through my die-cutting machine with a lovely little dotted embossing folder I found in my craft bag!


I created a distressed effect by dragging a Papermania brown die ink across all the edges, then assembled the pieces onto the card using Stick it 3D foam pads for dimension. To finish, I wound some Papermania string around the card, then used a blob of silicone glue to attach the 
sentiment on the top.


I loved creating this collection of papers – it was a refreshing change to design something out if my comfort zone. The initial sketch were done when my kids were zooming around at a soft play – all the other Mums were gossiping or reading their kindles, I was sketching from a box of mixed nuts and bolts! I had a few funny looks! Here are the initial sketches…


I scanned them into my pc and worked them up before converting some of them into 
paper designs in illustrator using this colour palette...


I used last week’s blue collection to make this digital card layout...

  
I would love to hear your comments - it is such a help when designing papers to hear 
other people's opinions. Thank you for looking! 

                     Jill x

Sunday, 19 May 2013

Fordson Super Dexta Sugar Paste Challenge!

My lovely husband has an interesting hobby - he spends most weekends in the autumn (a few are creeping in in the spring now as well!), ploughing up farmer's fields, along with many others, the aim being to win a trophy!

It may sound a little mad to many of you - these boys go out regardless of weather - but I have to say, after having a little dabble pre-kids, I do get it. It is exhausting but the sense of satisfaction at the end puts you on a high! There is an extraordinary sense of community, support and encouragement from the fellow ploughmen (and women), and at the end of the day, these colourful characters are helping to preserve a tradition, which would soon otherwise be lost.

To celebrate this, I set myself the challenge to create my hubby's Fordson Super Dexta and plough in sugar paste as the centre-piece of his birthday day (45, bless him!). It had me up late but I loved every minute of it...I used the modelling tools from the Little Venice Cake Company which were fabulous when constructing the tractor and plough! I also used their Deep Circle Cutters to create the wheels.

 
I made a few mistakes along the way - I was too eager to get going with the model that I tried to use a liquid food colour to get the blue. After using nearly half the bottle, the resulting sugar paste hasn't dried quite as I would have liked it, but it worked (note to self - concentrated colour next time!)
 
 
I also forgot to take off the plastic wrap from the cake board in my haste to get on with things!
 
 
I would also have covered the board with a square of textured sugar paste before
I put the cake on; it would have been so much easier!
 
 
However, I was pretty pleased with the overall effect, and every cake made is another
lesson learned for next time!
 
I used the following Little Venice Cake Company piping nozzles...
 
No. 22 To achieve the ploughed earth effect.
No. 47 To achieve the wooden fence effect.
No. 233 To achieve the stubble effect.
 
 
I find that it's the little details that you add to the cake that give it it's character. In this case, my hubby's faithful lunchbox, sighting poles and match contestant number (his age) that did the trick!
 

I made a plaque from two layers of sugar paste to add my message (although the writing could have been better, I did this very late at night with tired eyes!).


The girls added their own touch at the end - some personalised trophies and plaques!
The cake itself was a gluten free chocolate sponge with chocolate frosting, buttercream and sugar paste used to fill and decorate it. Every slice is filled to the brim with calories, but it did taste good!
 
 
Jum was really chuffed with it which made all the work worthwhile! A rough guess would say it took about 15-18 hours in total (this includes a lot of washing up time too!).
 

Adding the candles actually brought the tractor to life!


The sad bit...!
 

...and there it was, going, going, gone!
 
I hope you have enjoyed reading this post. It would be lovely to hear what you think!
 
Jill x


Sunday, 12 May 2013

Love, laugh, Live - using docrafts Creativity Club Chevron printables for scrapbooking

I haven't had much time for crafting this week (I have been absorbed every spare second making a 3D sugar paste tractor for my hubby's birthday cake!), but I couldn't resist making a quick digital scrapbook layout (8 x 8") using a combination of last week's and this week's Creativity Club Chevron and background downloads.

I designed these papers as a multi-use collection which could be utilized for masculine cards (Father's Day is coming soon!), as well as feminine designs. Although the colour palette includes pinks, the overall feel of strong linear design is perfect for all whole host of cards and scrapbook layouts.

Chevron & Backgrounds Colour Palette
 
I created the large chevron design with the thought that you could chop sections out to create bold design statements. Here is the digital layout I came up with...it features my two little honeys having a ball jumping off walls at a glorious country park we have nearby!


Photo of my girls was taken by the lovely Louise Jolley
http://www.louisejolleyphotography.com/
 
The layout is pretty simple, just layering up of the elements, and could easily be
adapted to make a birthday or greetings card.

Thank you for looking. Any comments would be much appreciated!
 
Jill x
 
Visit www.docrafts.co.uk to find out
more about the Creativity Club
 

Saturday, 4 May 2013

If you love sweets, you may like this...!

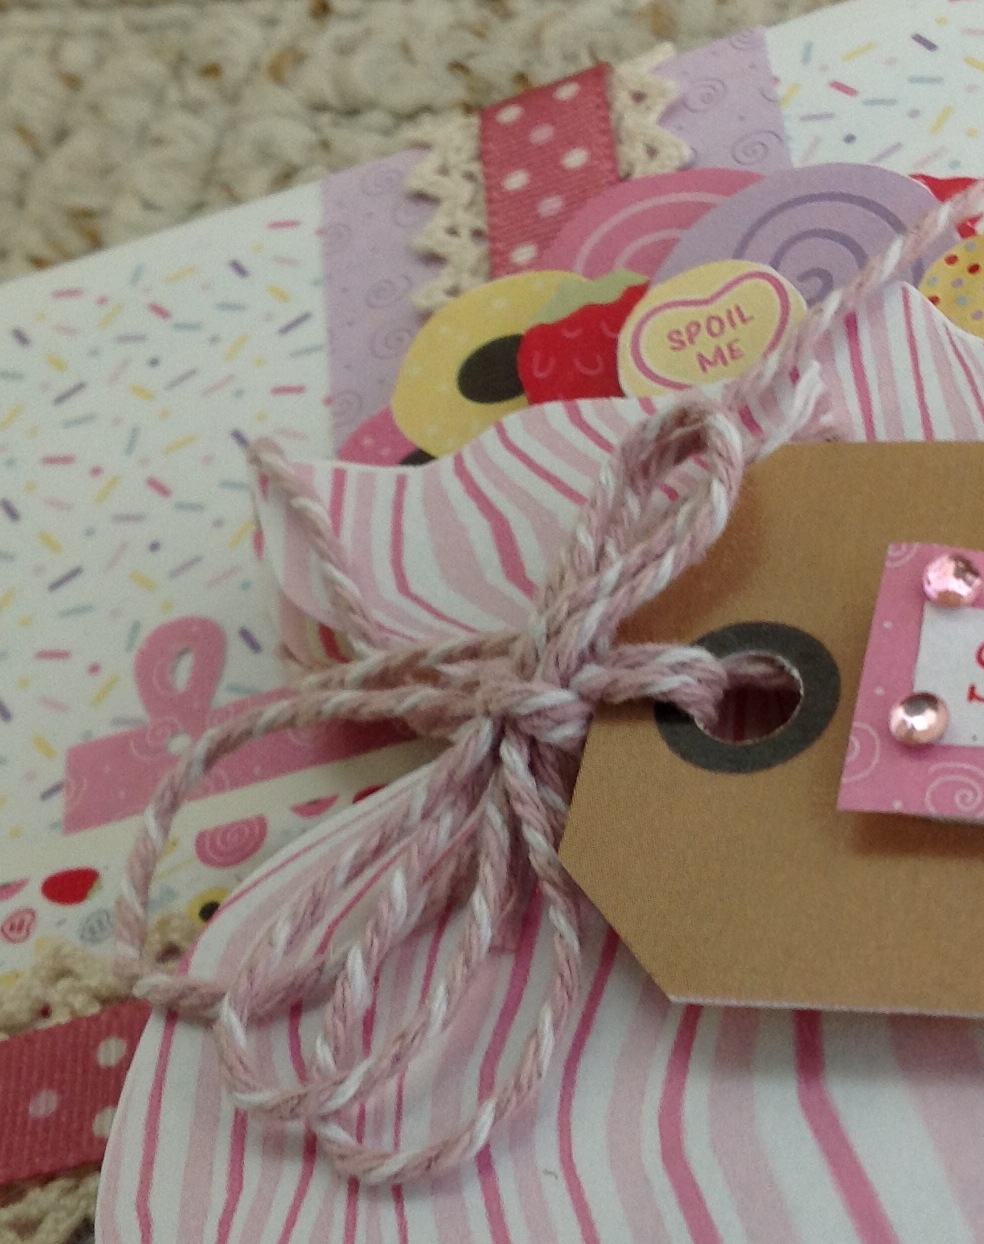
Phew, it's been a while since I had a chance to blog - we have just been on a fabulous family holiday to the gorgeous Center Parcs, and now we are back, have just had the chance to take a few piccies of the card I made in a few hours I snatched just before we went away! It's made using last week's docrafts Creativity Club printables 'Candy Love' which I designed after an inspiring trip to the sweet shop (what an excuse to sample the goods before sketching!).


To create the depth, I used silicone glue and slighty twisted the top layer of the decoupage bag to create a more 3D impression...
 
 
I added somePapermania ribbon and Vintage Notes Lace Borders to the mix for effect...


...and to finish, some craft twine to tie the bag.
Thanks for looking!
 
Jill x


Monday, 22 April 2013

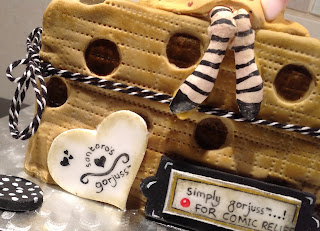
Gorjuss gluten free sponge cake for Comic Relief

I have finally got around to putting together the step by steps on how to make my Comic Relief cake featuring the girl from the brand Gorjuss! They are featured in full on the docrafts.com website...

http://www.docrafts.com/project/Gorjuss-Cake/p3509553/tStepByStep

The cake was completely edible (apart from the ribbon!), gluten free and won the Comic Relief Bake Off which was fantastic! It took about 9 hours to do from start to finish, but would probably be much quicker for someone following the step by steps. I did an hour or so here and there (between work, school runs and housework!), and it didn't seem that long - I was surprised when I added it all up! If you have any links to projects you have done using sugar paste, I would love you to paste them into a comment. I have completely got the cake making bug now - I  am dreaming up one for my hubby next month, that will be a challenge!


The finished cake


Thank you for looking!

Jill x
 

Saturday, 20 April 2013

A friend is someone who can touch your heart...

Finally I have managed to post! This week has been chaotic but along the way I have had time to reflect on how lucky I am to have such good friends...it's so lovely to know that you can pick the phone up and they are there for you (Mum, I'm also including you in this, you are amazing).

With this in mind, here's a card I made using docrafts Creativity Club downloads 'Spring Blossom' and 'Over the Hill' and the Xcut Bird Cage die - not sure why the birdcage features, I was just inspired by it!


Thank you for looking!
 
Jill x

Sunday, 14 April 2013

Sugar paste bear TUTORIAL


My finished bear!
I was recently handed the challenge of making a 3D bear from sugar paste to go onto my Grandma's birthday cake - here’s how I did it (with help from a couple of enthusiastic
little girls of course!)...
 
My little helpers!
 
You will need;
Sugar paste & icing sugar (or cornflour)
Cream, dark brown and pink colouring
Mini rolling pin
Sugar paste round ended tool
Cocktail stick, spaghetti and paintbrush

How to;
My bear was about 8cm tall, however, the same technique could be used for any sized bear.
1. Roll a ball of cream sugar paste for the body. Stick a length of spaghetti into the middle – this will act as a support for the head.

2. Roll a ball for the head and slightly flatten to create an oval. Stick onto the spaghetti.

3. To make the ears, roll a small ball and flatten with your thumb, cut in half, stick to the side of the bear’s head using cool, boiled water.


4. Make another small ball for the nose section and flatten, stick to the front of the bear’s face. Add a small dark brown nose to the top half.

5. To make the arms, create two cylinders of paste and roll one end gently between your fingers to create a tapered end. Mold them to the side of the bear, using cool boiled water as adhesive. 
 
 
6. Repeat for the legs with slightly larger cylinders. Flatten the large ends to create feet.


7. Add small half circles of pale pink paste to the inside of each ear and flat circles of pale pink to the feet. Use the rounded end of a sugar paste tool to create the pad indents. Add two small brown eyes and paint on a mouth.

 
9.The ribbon (optional). Roll a thin length of dark pink sugar paste and wrap it around the bear’s neck.
Roll and cut out two short lengths of dark pink paste, cut the end of each so that it is on the diagonal and stick these onto the front of the bear to create the ribbon ends.

To create the ribbon loops, roll out and cut two rectangles from the same colour paste. Create the loops by joining the ends of each together leaving a gap between the two layers. Stick these onto the bear’s neck.
To finish, cut a short rectangle and wrap it around the ribbon joins to create the finished bow.

10. Add texture to your finished bear and ribbon using the end of a cocktail stick!
My girls loved doing this - here are their finished bears (with pink dresses of course!)
 
 
If you have made any 3D characters, flowers or whatever with sugar paste, leave me a comment and paste in a link -
I would love to see them!
 
Jill x
 

You might also like