Showing posts with label gluten free. Show all posts

Wednesday, 16 March 2016

Hedgehog Wrap Cake


I have a passion for creating both vector illustrations and decorating cakes, so I thought it was about time I combined them both! My daughter has a crush on all things hedgehog, so on her birthday, I designed a cute repeating hedgie pattern with co-ordinating stripes in illustrator then printed them onto edible icing sheets. Combine that with a gluten free mud cake and she was a happy girl!

The icing wrap sat beautifully on some sharp-edged ganache.


I made the 3D hedgehogs out of modelling paste,
using decoupage scissors to create the prickles.


Pretty blue ribbon added that finishing touch.
Now off to dream up some more cake wraps!

Thank you for viewing
Jill x 


Sunday, 6 April 2014

Gluten Free Naked Cake!

I am being converted to loving the new trend of Naked Cakes which is getting more and more popular in the cake world. They skip the iced covering and show off the actual cake and filling in all their glory! You need to consider your cake and filling colour, flavour and consistency in a different way to when you cover cakes with icing - you can have no runny fillings or burnt edges - there is no room to hide!
 
Here is my first Naked Cake which I made for my Mum on Mother's Day. With three coeliacs at the tea party, gluten free vanilla sponges were the order of the day! I am a massive fan of Orgran Gluten Free Self Raising Flour - it is an ideal swop for normal SR flour- there is no difference in the taste or consistency and is so easy to use (I'll give you the recipe further down the post)...

 
 The beauty of Naked Cakes is that you can use simple decorations - I know I have combined flowers and fruit on this version, but assorted fruits and any other relevant edible offerings work perfectly. I sprinkled mine with a little icing sugar just before serving to get a lovely finish.

The flowers were made with gumpaste (sugarpaste mixed with Tyo powder in this instance) and shaped using the Little Venice Cake Company Modelling Tools and Mat. They were possibly the quickest flowers I have ever made as time was short (10pm the night before!) but I was happy with the overall effect. The flowers were wired and inserted into mini flower picks which were pushed
into the sponge at staggered heights.

 
Here's the gluten free recipe for 3 lots of 8" vanilla sponges (base tier) 
(swop the vanilla extract for other flavours if you wish)
 
12oz Soft Margarine (at room temperature)
12oz Golden Caster Sugar
6 Large Eggs (at room temperature)
2 tsp Vanilla Extract (spend more on a quality one such as Nielsen Massey -
it is worth the expense as it makes such a difference to the flavour)
 
Heat the oven to 180 0C then grease and line your cake tins (I used the Little Venice Cake Company Professional Grade Anodised Cake Tins as I love the quality). Cream the margarine and sugar together until fluffy then gradually add in the beaten eggs and vanilla extract. Sift in the flour and use a metal spoon to fold it onto the mixture. Divide the mixture equally between three tins and bake for 20 - 25 minutes until light golden brown and springy to the touch in the middle.
 
If you do not have three tins the same size, make each layer one at a time using freshly prepared mixture. It is worth the effort as the baking agents in the mixture can start to work whilst it sits in the bowl and can spoil the sponge.
 
For the top tier, use 6" tins and alter the quantities to 9oz of margarine, sugar and flour and 4.5 eggs
(add one egg to a cup, beat it then measure out half) - use the same amount of vanilla extract and bake for 15 - 20 minutes.


The cake was filled with beaten double cream and strawberry jam and went down a storm! Apparently, it even freezes well too (just as well as there was rather a lot to eat!). As you can see, I used Little Venice Cake Company Dowelling Rods to support the top tier and prevent it
squashing the base.
 
Thank you for looking - I would love your thoughts or ideas on naked cakes or gluten free baking!
 
Jill x

Sunday, 19 May 2013

Fordson Super Dexta Sugar Paste Challenge!

My lovely husband has an interesting hobby - he spends most weekends in the autumn (a few are creeping in in the spring now as well!), ploughing up farmer's fields, along with many others, the aim being to win a trophy!

It may sound a little mad to many of you - these boys go out regardless of weather - but I have to say, after having a little dabble pre-kids, I do get it. It is exhausting but the sense of satisfaction at the end puts you on a high! There is an extraordinary sense of community, support and encouragement from the fellow ploughmen (and women), and at the end of the day, these colourful characters are helping to preserve a tradition, which would soon otherwise be lost.

To celebrate this, I set myself the challenge to create my hubby's Fordson Super Dexta and plough in sugar paste as the centre-piece of his birthday day (45, bless him!). It had me up late but I loved every minute of it...I used the modelling tools from the Little Venice Cake Company which were fabulous when constructing the tractor and plough! I also used their Deep Circle Cutters to create the wheels.

 
I made a few mistakes along the way - I was too eager to get going with the model that I tried to use a liquid food colour to get the blue. After using nearly half the bottle, the resulting sugar paste hasn't dried quite as I would have liked it, but it worked (note to self - concentrated colour next time!)
 
 
I also forgot to take off the plastic wrap from the cake board in my haste to get on with things!
 
 
I would also have covered the board with a square of textured sugar paste before
I put the cake on; it would have been so much easier!
 
 
However, I was pretty pleased with the overall effect, and every cake made is another
lesson learned for next time!
 
I used the following Little Venice Cake Company piping nozzles...
 
No. 22 To achieve the ploughed earth effect.
No. 47 To achieve the wooden fence effect.
No. 233 To achieve the stubble effect.
 
 
I find that it's the little details that you add to the cake that give it it's character. In this case, my hubby's faithful lunchbox, sighting poles and match contestant number (his age) that did the trick!
 

I made a plaque from two layers of sugar paste to add my message (although the writing could have been better, I did this very late at night with tired eyes!).


The girls added their own touch at the end - some personalised trophies and plaques!
The cake itself was a gluten free chocolate sponge with chocolate frosting, buttercream and sugar paste used to fill and decorate it. Every slice is filled to the brim with calories, but it did taste good!
 
 
Jum was really chuffed with it which made all the work worthwhile! A rough guess would say it took about 15-18 hours in total (this includes a lot of washing up time too!).
 

Adding the candles actually brought the tractor to life!


The sad bit...!
 

...and there it was, going, going, gone!
 
I hope you have enjoyed reading this post. It would be lovely to hear what you think!
 
Jill x


Monday, 22 April 2013

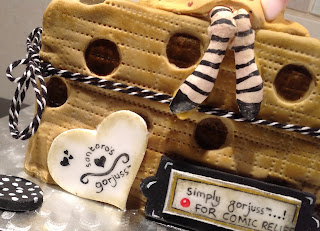
Gorjuss gluten free sponge cake for Comic Relief

I have finally got around to putting together the step by steps on how to make my Comic Relief cake featuring the girl from the brand Gorjuss! They are featured in full on the docrafts.com website...

http://www.docrafts.com/project/Gorjuss-Cake/p3509553/tStepByStep

The cake was completely edible (apart from the ribbon!), gluten free and won the Comic Relief Bake Off which was fantastic! It took about 9 hours to do from start to finish, but would probably be much quicker for someone following the step by steps. I did an hour or so here and there (between work, school runs and housework!), and it didn't seem that long - I was surprised when I added it all up! If you have any links to projects you have done using sugar paste, I would love you to paste them into a comment. I have completely got the cake making bug now - I  am dreaming up one for my hubby next month, that will be a challenge!


The finished cake


Thank you for looking!

Jill x
 

You might also like