Showing posts with label birthday. Show all posts

Wednesday, 16 March 2016

Hedgehog Wrap Cake


I have a passion for creating both vector illustrations and decorating cakes, so I thought it was about time I combined them both! My daughter has a crush on all things hedgehog, so on her birthday, I designed a cute repeating hedgie pattern with co-ordinating stripes in illustrator then printed them onto edible icing sheets. Combine that with a gluten free mud cake and she was a happy girl!

The icing wrap sat beautifully on some sharp-edged ganache.


I made the 3D hedgehogs out of modelling paste,
using decoupage scissors to create the prickles.


Pretty blue ribbon added that finishing touch.
Now off to dream up some more cake wraps!

Thank you for viewing
Jill x 


Friday, 11 July 2014

Frozen Olaf Birthday Cake

My house is ringing with the repeated "Let it Snow" song from the Frozen movie - my youngest daughter simply loves it, so I guess it was no surprise her brief for this year's birthday cake was for an Olaf theme! For me, this was a challenge as I have never seen the film, so, after a little online research and a lots of invested time  I came up with this...

 
I used Little Venice Cake Company 6" and 4" round tins to make the two sponges first, filled and covered them with sugarpaste then stacked them onto a deep covered board.
 
In the evenings in the lead up to this, I made a series of assorted light blue and white triangles from modelling paste and left them to dry out.
 
I also cut some large and small snowflakes, some of which I inserted white florist wire into to make the topper. I then used non-toxic PVA glue to secure some assorted Cousin crystal and pearl beads onto the wires and left them to dry.
 
 
Olaf was more challenging! Using modelling paste, I firstly made two balls, one for the body and one for the upper body and secured them together with a cocktail stick and sugar glue. The head was formed from a cone shape, the mouth modelled with Little Venice Cake Company Modelling Tools and in-filled with black modelling paste.
 
I made two indents for the eyes using the small end of the bone tool and stuck a small ball of black paste into each which I then pressed down with the bone tool. Add a ball of white onto each eye and finish with a small flattened ball of black.

 
I stuck the arms and detail on once the body and head had dried out (3 days).
 
Assembly was the best bit! The triangles are fab as they cover up any imperfections in the icing! The dark, watery effect top which Olaf is standing on was made by partially rolling together two tones of blue sugarpaste then rolling it out - it creates a lovely marble/watery effect. Always use a florist flower pick to stick your wired topped into to prevent the wire from touching the cake.
 
I can't wait for her to see it now! Thank you for looking!
 
Jill x

Sunday, 16 February 2014

Male themed Birthday card using docrafts Creativity Club printables

Well, it's #docraftsmonday (thank you Emma!) and I thought it was about time I got my craft stash out - you forget how good it can make you feel, simply being focused on one thing instead of ten for a change. Here's the result - a birthday card for my Father-in-Law (don't show him this yet Barb!), using the printables I designed for this week's Creativity Club download. There are flowers included in the collection, but I missed those out and converted the patterns into a more masculine card...
 
 
I love layers and dimension so I used lots of 3D foam squares and layers of paper
mounted onto card to created a sense of depth...


...I wrapped craft string around the card base randomly...
 
 
...and used lots of dark brown dye ink to get a vintage effect.


The inside of the card echoed the same design as the front...


...and I used red buttons to add that finishing touch!
 
Thank you for looking and don't forget to join in #docraftsmonday!
 
Jill x
 
#docraftsmonday is like a weekly crafty 'show and tell'.
To get involved on Facebook:
On Monday, post a photo on https://www.facebook.com/docrafts of your recent craft project
and add the hashtag #docraftsmonday.

You can see all #docraftsmonday projects by visiting the page and viewing the 'Posts by Others' section, clicking on the #docraftsmonday hashtag, or searching '#docraftsmonday'
in the Facebook search box. When you see a #docraftsmonday project you like,
make sure you comment or give it a Like!
 

Tuesday, 7 January 2014

Birthday Card - You are never too old to dream a new dream...

I made this card for my brother's birthday - he has just started sea swimming and has set himself some personal goals for this year!


I used a combination of the docrafts Creativity Club Sentiments Collections (1 & 2), Xcut Build-a-Scene dies XCU 503156 (for the waves), Xcut Dies Rectangle Parenthesis XCU 503045 (for the text panel), plus a mix of Papermania Capsule products and a blue wallaper which I got as a sample from a DIY store!


Thank you for looking!

Jill x

Saturday, 26 October 2013

For a special friend - a birthday bottle card

I have known Kerry for around 32 years since we were at primary school. She is one amazing lady and we have accumulated loads of funny special memories between us over the decades! We have experienced love, laughter, heartbreak, marriage, careers and have been blessed with four beautiful girls between us who are carrying on the tradition of female bonding.
 
The sentiment on this bottle card has been taken from the docrafts Creativity Club sentiments collection I designed and it so says how I feel...
 
"A friend is someone who gives you total freedom to be yourself."
 
Happy Birthday Hon!
 
 
I made the origami heart by following the fabulous Beckie Dreyer's origami heart
template which can be found here. Once you have had a play and mastered the technique it is
quite addictive, so much so, my Christmas cards are being designed around them!
 
 
I used the Owl collection printables I designed for the Creativity Club to create the
theme and embellished the heart with Papermania Adhesive Stones and Bow.
 
 
I am a little addicted to my die-cut machine and antiquing with inks, so once again,
these techniques have found their way in!

 
To finish the back, I added a blank die-cut heart so that I can write my message.
A Papermania Ribbon and Baker's Twine completes the design.


Thank you for looking!
 
I hope you enjoy the wine Kerry!
 
Jill x


Tuesday, 27 August 2013

Ombre Ruffle Rose 80th Birthday Cake

Hi, I feel a little rusty as have not had a chance to blog for a while but here goes!
I was asked a while ago to make a pretty 80th birthday cake using a colour palette of lilac
and pink and here's what I came up with...

 
The ruffles are really easy to make (and quite addictive too!). I simply cut lengths of sugar paste then used a ball tool to ruffle the edges. I then stuck them to the cake sides from top to bottom using a little water as adhesive. To create the depth of ruffle, I concertinaed the strips as I stuck them on.
 
 
To create the ombre effect, I used a graduation of colours from top to bottom.
To get the colours right, I found it much easier to create a range of coloured sugar paste balls first and lie them next to each other on my worktop. Start light then darken to suit until you get the perfect colour mix.
 
 
I created the roses by making a cone of sugar paste for the centre, then wrapping cut circles
of thin sugar paste around it, tweaking the petals as you go to achieve a natural shape.
The roses were left to dry on greaseproof paper in a Yorkshire pudding tin, then dusted with
edible pearl lustre for a pretty sheen.
 
The 80 was made but pressing a Papermania 8 and 0 clear backed stamp into a thick section of rolled sugar paste, which I then cut out, left to dry, added the sheen and mini flowers.
 
 
I made the mini flowers using a metal cutter and molded them to a 3D shape and
used these to decorate the 80 and fill in any gaps!
 
 
Thank you for looking!
 
I would like to enter this cake into the Craft Blogging Central August challenge (I know it is not specifically craft but it is sugar craft so it may count!)
 
Jill x


Sunday, 14 July 2013

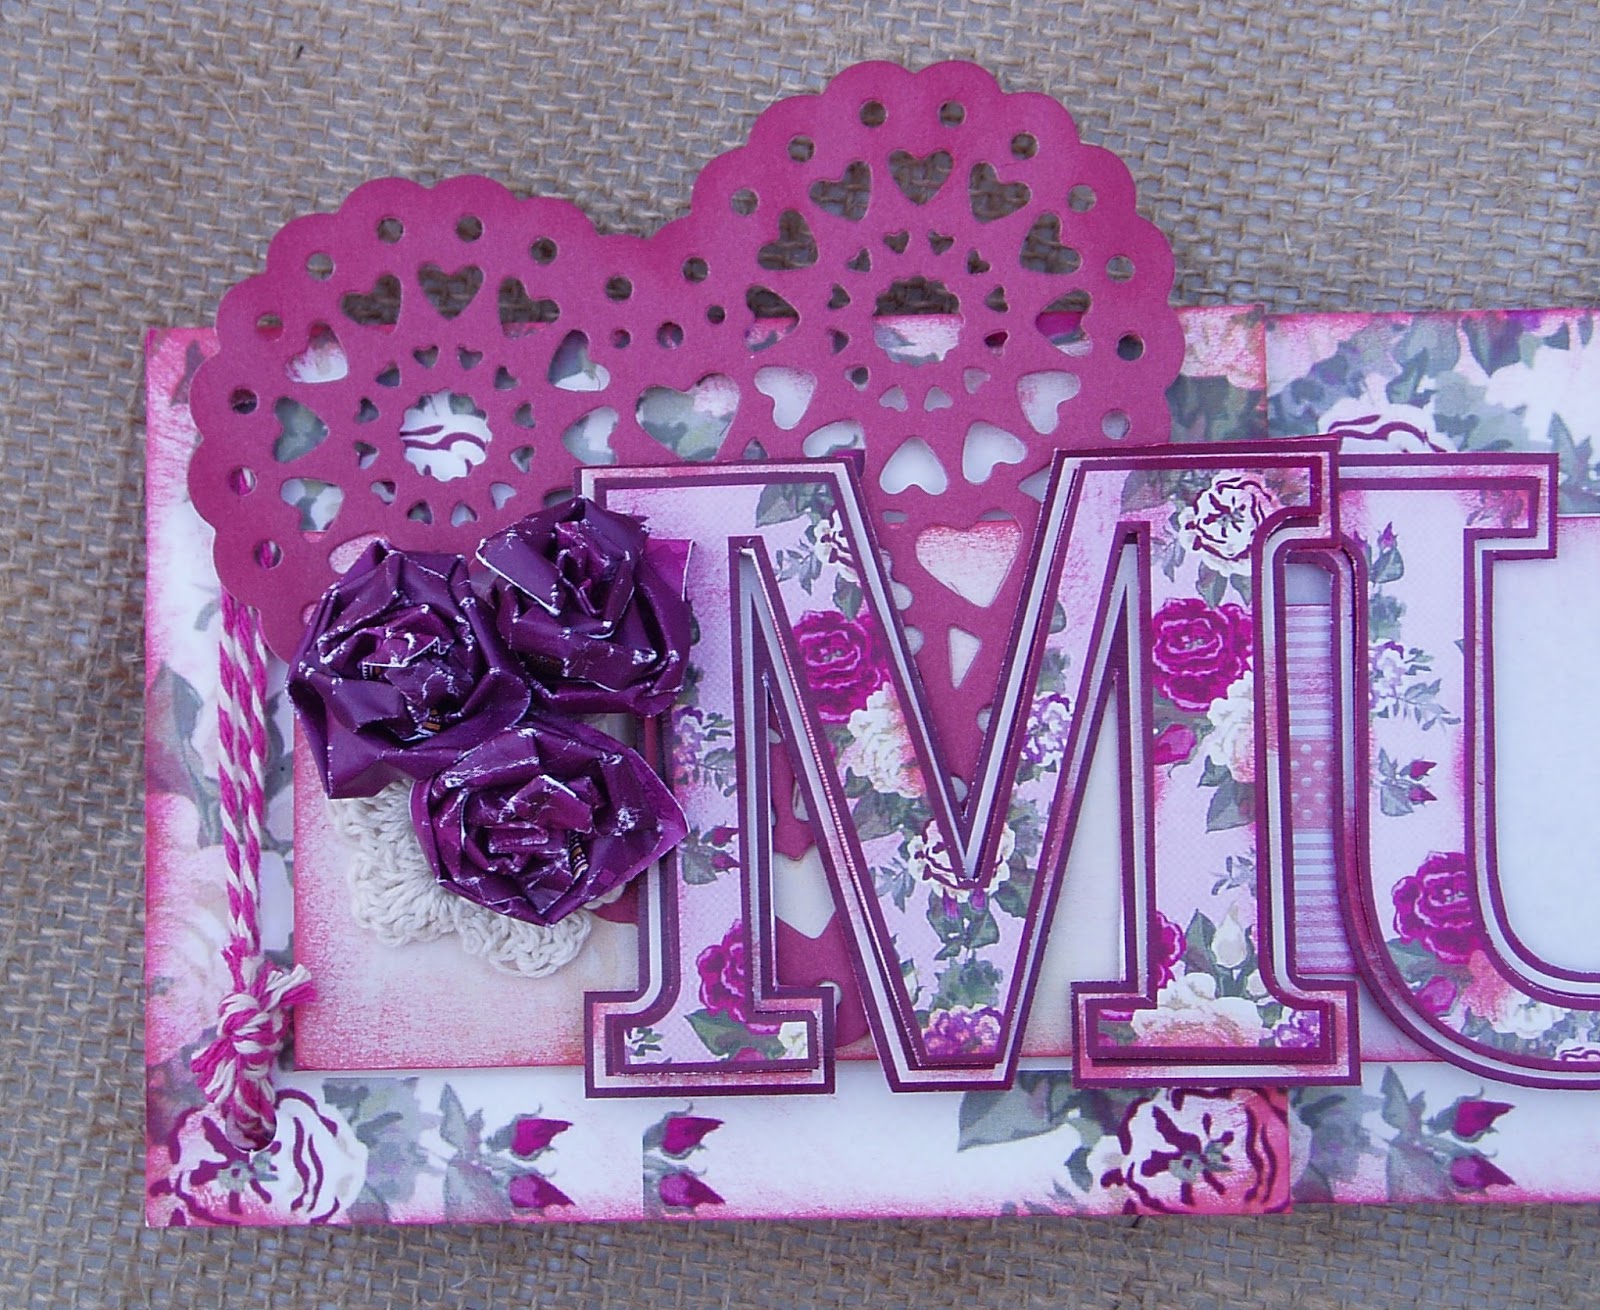
Happy Birthday Mum Booklet Card

Well, it's July 13th and today we celebrate both my daughter's 6th and my Mum's (something!) birthday, so a busy day all round! It seems like only yesterday Mum was urging me to 'Hurry Up!"
as her birthday was nearly over and baby still had to make its entrance - luckily, I was able to
 give her the best birthday present ever, a healthy Granddaughter, the delightfully lovely
(sometimes tricky!) Evie Mae.

Here's the booklet card I made for Mum, designed to contain her gift vouchers. I created it using a mix of  Floral and Paisley papers I designed for the docrafts Creativity Club along with a mix of
Papermania Vintage Notes and Capsule Pastels collections.


The heart is the gorgeous Papermania Vintage Notes Filigree Heart die.
The 3D flowers on the front were made by rolling and scrunching a length
of burgundy paper, then securing the base before attaching to the
card with silicone glue.


I made the letter templates by printing them out from my pc then cutting
the shapes from the Floral rose papers. I love the dimensional look so I have used
loads of 3D sticky pads and layers to create depth.


The vintage effect was made by swiping a dark pink
dye pad over all the card edges. 


On the last page of the booklet, I created a mini open envelope
to house  the vouchers.

Thanks for taking the time to look!

Jill x 


Sunday, 19 May 2013

Fordson Super Dexta Sugar Paste Challenge!

My lovely husband has an interesting hobby - he spends most weekends in the autumn (a few are creeping in in the spring now as well!), ploughing up farmer's fields, along with many others, the aim being to win a trophy!

It may sound a little mad to many of you - these boys go out regardless of weather - but I have to say, after having a little dabble pre-kids, I do get it. It is exhausting but the sense of satisfaction at the end puts you on a high! There is an extraordinary sense of community, support and encouragement from the fellow ploughmen (and women), and at the end of the day, these colourful characters are helping to preserve a tradition, which would soon otherwise be lost.

To celebrate this, I set myself the challenge to create my hubby's Fordson Super Dexta and plough in sugar paste as the centre-piece of his birthday day (45, bless him!). It had me up late but I loved every minute of it...I used the modelling tools from the Little Venice Cake Company which were fabulous when constructing the tractor and plough! I also used their Deep Circle Cutters to create the wheels.

 
I made a few mistakes along the way - I was too eager to get going with the model that I tried to use a liquid food colour to get the blue. After using nearly half the bottle, the resulting sugar paste hasn't dried quite as I would have liked it, but it worked (note to self - concentrated colour next time!)
 
 
I also forgot to take off the plastic wrap from the cake board in my haste to get on with things!
 
 
I would also have covered the board with a square of textured sugar paste before
I put the cake on; it would have been so much easier!
 
 
However, I was pretty pleased with the overall effect, and every cake made is another
lesson learned for next time!
 
I used the following Little Venice Cake Company piping nozzles...
 
No. 22 To achieve the ploughed earth effect.
No. 47 To achieve the wooden fence effect.
No. 233 To achieve the stubble effect.
 
 
I find that it's the little details that you add to the cake that give it it's character. In this case, my hubby's faithful lunchbox, sighting poles and match contestant number (his age) that did the trick!
 

I made a plaque from two layers of sugar paste to add my message (although the writing could have been better, I did this very late at night with tired eyes!).


The girls added their own touch at the end - some personalised trophies and plaques!
The cake itself was a gluten free chocolate sponge with chocolate frosting, buttercream and sugar paste used to fill and decorate it. Every slice is filled to the brim with calories, but it did taste good!
 
 
Jum was really chuffed with it which made all the work worthwhile! A rough guess would say it took about 15-18 hours in total (this includes a lot of washing up time too!).
 

Adding the candles actually brought the tractor to life!


The sad bit...!
 

...and there it was, going, going, gone!
 
I hope you have enjoyed reading this post. It would be lovely to hear what you think!
 
Jill x


Saturday, 6 April 2013

Spring Blossom Birthday Card

Here's a layered card I designed for my lovely Grandma' s birthday using the docrafts Creativity Club 'Spring Blossom' printables. I stuck the decoupage flowers and vase onto some card, cut them out, then assembled them to create this card - it was really easy and fun to make!


You might also like