Wednesday, 1 January 2014

Festive Wedding Cake

Hello and Happy New Year! I hope you have all managed to escape the flooding and power cuts the recent weather conditions have resulted in - we have been blessed in our part of Dorset, so, so lucky.
 
One of my New Year's resolutions is to catch up on my blog posts - I have a backlog of craft/cake projects to put on...here is the first!
 
I was recently asked to make a wedding cake for my Boss's sister - the brief was to make it festive with a cranberry/silver and white colour palette with a touch of holly, making a sugarpaste ribbon the feature on the top tier...
 
To create the ribbon loops, I mixed some Gum Tragacanth (a plant derived powder which is used to stiffen sugarpaste, making it set harder and hold it's shape), into the cranberry paste, wrapped it in clingfilm and left it overnight. I then created the loops from lengths of paste and secured a cocktail stick into the end of each loop using a little cool, boiled water, shaped them and left them to dry out.


I opted to use the cocktail sticks as the cake had to be transported across country
and they prevented the loops from slipping!
 
 
What I love about cake decorating, is that each cake teaches me something different and
new and inspires me to try out more techniques!
 
Thank you for looking
Have a great 2014!
 
Jill x


Tuesday, 10 December 2013

Gingerbread House Cupcakes as seen in the docrafts Creativity Magazine

If you fancy being a little creative with your cake making this Christmas, then
why not have a go at creating this little collection!


The cupcakes and houses were all made using the Little Venice Cake Company Tools, 
which you can view at docrafts.com


I have to say, I really enjoyed this project - it was just a little tricky stopping the girls 
from eating them before they were photographed!

To see how to make them step by step visit my docrafts gallery here

Thank you for looking!

Jill x


Tuesday, 12 November 2013

Jewellery Birthday Cake


Phew, things have been a little crazy to say the least – I have a backlog of creative projects to blog about and no time to do it! Anyway, here are some photos of a cake I made for my friend Kerry’s birthday the other week.  I wanted to try out using jewellery as a cake topper – I have seen some amazing designs by cake artists online, LindySmith for example. I have to say, I love the effects that you can achieve with a little jewellery wire and beads. I will definitely be using this technique again!


You will have to excuse the lighting - I have about 10 minutes to take the shot before I
delivered the cake and I had very little natural light!


To create the topper, I selected a variety of purple tones and crystal beads in an assortment of designs and sizes then threaded them onto some 26 guage gold wire. I then looped the wire around the beads to hold them into place. I made the twirly bits by wrapping the wire around a pen, then secured all the ends into a flower pic, which was already inserted into the cake. If you stuff the flower pic first with a little sugar paste, it will hold the wires steady.


The cake design was inspired from the label of a bottle of bubble bath! I used a mixture of
silicone molds and Little Venice Cake Company nozzles to create the paisley effect. I loved the dimensional result, but make sure you allow plenty of time for this technique as it can take ages!


 Thank you for looking!

Jill x

Saturday, 26 October 2013

For a special friend - a birthday bottle card

I have known Kerry for around 32 years since we were at primary school. She is one amazing lady and we have accumulated loads of funny special memories between us over the decades! We have experienced love, laughter, heartbreak, marriage, careers and have been blessed with four beautiful girls between us who are carrying on the tradition of female bonding.
 
The sentiment on this bottle card has been taken from the docrafts Creativity Club sentiments collection I designed and it so says how I feel...
 
"A friend is someone who gives you total freedom to be yourself."
 
Happy Birthday Hon!
 
 
I made the origami heart by following the fabulous Beckie Dreyer's origami heart
template which can be found here. Once you have had a play and mastered the technique it is
quite addictive, so much so, my Christmas cards are being designed around them!
 
 
I used the Owl collection printables I designed for the Creativity Club to create the
theme and embellished the heart with Papermania Adhesive Stones and Bow.
 
 
I am a little addicted to my die-cut machine and antiquing with inks, so once again,
these techniques have found their way in!

 
To finish the back, I added a blank die-cut heart so that I can write my message.
A Papermania Ribbon and Baker's Twine completes the design.


Thank you for looking!
 
I hope you enjoy the wine Kerry!
 
Jill x


Sunday, 13 October 2013

Cupcake Celebration Cake (as seen in the docrafts Bake magazine)

I have been lucky enough to be commissioned to make a series of cakes for the docrafts Bake magazine which was on sale with the newsstand September issue of the docrafts Creativity magazine! One of my briefs was to create a celebration cupcake design using the Little Venice Cake Company products. I am always looking for ways to challenge myself, so I decided it would be a good idea to push the boundaries of gravity! Here’s the finished result.....


There were about 45 cupcakes in total, both large and small, and it was a challenge to figure out how to assemble them into a tower! The theory was a type of helter-skelter, with bands of chocolate, violet and lavender cakes tumbling down the sides. 
 
 
After much experimenting, I decided upon creating a tower of polystyrene rings, secured together with glue. I covered them with two sheets of pale lavender and silver tissue paper, securing into position with pins, then stuck the whole creation to my cake board with butter cream.
 
Then for the fun bit! To determine how many cupcakes I needed to make, I attached cupcake cases to the tower with cocktail sticks, then played with colours by adding stickers/felt pens to the cases to get a feel for the design.
 
Full steps and instructions can be found in the September docrafts Bake magazine.
Have fun and thank you for looking!
 
Jill x

Tuesday, 27 August 2013

Ombre Ruffle Rose 80th Birthday Cake

Hi, I feel a little rusty as have not had a chance to blog for a while but here goes!
I was asked a while ago to make a pretty 80th birthday cake using a colour palette of lilac
and pink and here's what I came up with...

 
The ruffles are really easy to make (and quite addictive too!). I simply cut lengths of sugar paste then used a ball tool to ruffle the edges. I then stuck them to the cake sides from top to bottom using a little water as adhesive. To create the depth of ruffle, I concertinaed the strips as I stuck them on.
 
 
To create the ombre effect, I used a graduation of colours from top to bottom.
To get the colours right, I found it much easier to create a range of coloured sugar paste balls first and lie them next to each other on my worktop. Start light then darken to suit until you get the perfect colour mix.
 
 
I created the roses by making a cone of sugar paste for the centre, then wrapping cut circles
of thin sugar paste around it, tweaking the petals as you go to achieve a natural shape.
The roses were left to dry on greaseproof paper in a Yorkshire pudding tin, then dusted with
edible pearl lustre for a pretty sheen.
 
The 80 was made but pressing a Papermania 8 and 0 clear backed stamp into a thick section of rolled sugar paste, which I then cut out, left to dry, added the sheen and mini flowers.
 
 
I made the mini flowers using a metal cutter and molded them to a 3D shape and
used these to decorate the 80 and fill in any gaps!
 
 
Thank you for looking!
 
I would like to enter this cake into the Craft Blogging Central August challenge (I know it is not specifically craft but it is sugar craft so it may count!)
 
Jill x


Sunday, 14 July 2013

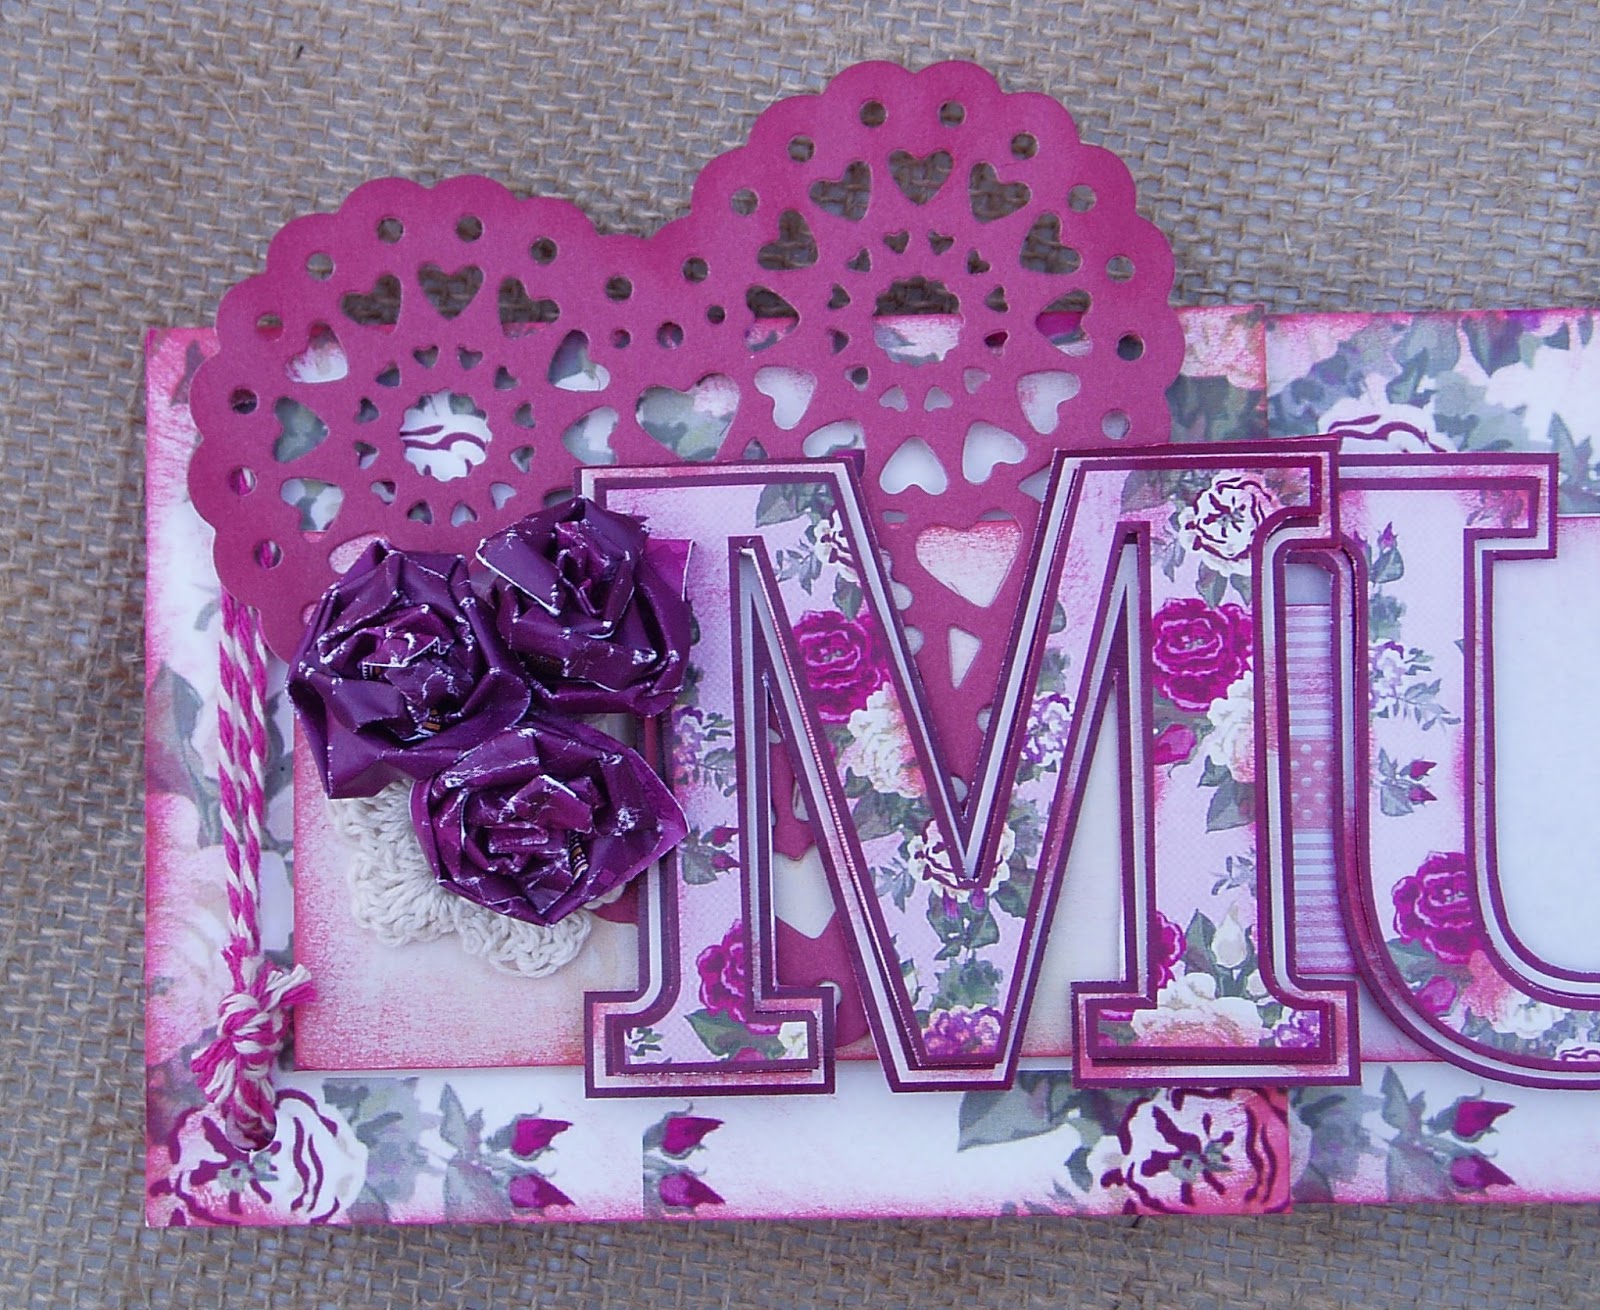
Happy Birthday Mum Booklet Card

Well, it's July 13th and today we celebrate both my daughter's 6th and my Mum's (something!) birthday, so a busy day all round! It seems like only yesterday Mum was urging me to 'Hurry Up!"
as her birthday was nearly over and baby still had to make its entrance - luckily, I was able to
 give her the best birthday present ever, a healthy Granddaughter, the delightfully lovely
(sometimes tricky!) Evie Mae.

Here's the booklet card I made for Mum, designed to contain her gift vouchers. I created it using a mix of  Floral and Paisley papers I designed for the docrafts Creativity Club along with a mix of
Papermania Vintage Notes and Capsule Pastels collections.


The heart is the gorgeous Papermania Vintage Notes Filigree Heart die.
The 3D flowers on the front were made by rolling and scrunching a length
of burgundy paper, then securing the base before attaching to the
card with silicone glue.


I made the letter templates by printing them out from my pc then cutting
the shapes from the Floral rose papers. I love the dimensional look so I have used
loads of 3D sticky pads and layers to create depth.


The vintage effect was made by swiping a dark pink
dye pad over all the card edges. 


On the last page of the booklet, I created a mini open envelope
to house  the vouchers.

Thanks for taking the time to look!

Jill x 


You might also like